How To Create A Lightning App In Salesforce
Introduction
In this Salesforce tutorial, you will learn all the basics of Salesforce Lightning and will understand how important Salesforce Lightning is in the present times. First, let's see What is CRM? Further, you will come to know what made Salesforce Lightning come into play.
Customer Relationship Management (CRM) is a tool by which a company manages customer interactions based on data analysis.
As this digital age is changing, it needs to transform the ways of an organization's interaction with its customers. This is where Salesforce Lightning comes into the picture.
Watch this video for a better understanding of Salesforce Lightning:
Salesforce Lightning Tutorial Salesforce Lightning Tutorial

Before going any further, check out the concepts covered in this tutorial section:
- What is Salesforce Lightning?
- Lightning Experience
- Lightning Component
- Open-source Aura Framework
- Browser Support Considerations for Lightning Component
- Using Developer Console
- Creating a Component for Lightning Experience and Salesforce Mobile App
- Loading Contacts
- Firing Events
- Online Learning to Understand Better
Salesforce is a cloud-based business application that helps organizations stay connected to their customers. Salesforce can be very useful in lead generation, improving sales, deal closures, marketing domain, customer service, analytics, etc. With Salesforce, you can develop apps and maintain an app ecosystem.
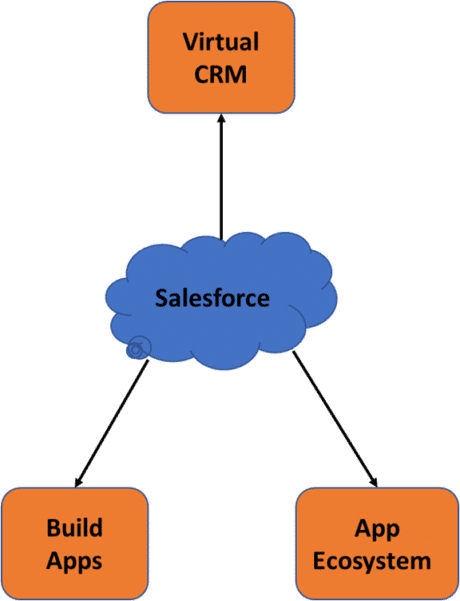
Virtual CRM is to hold customers' end-to-end information that can be accessed by everyone with specific permissions. Apps can be easily built even without coding. The app ecosystem provides billions of installed apps that can be sold to customers. Salesforce is the world's best CRM platform that enables organizations to sell, service, and market their products and services.
Now, what is Salesforce Lightning? Let's come to this.
What is Salesforce Lightning?
Salesforce Lightning is a platform that provides tools to build next-generation UI and UX in Salesforce. Salesforce Lightning helps organizations create a modern productivity-boosting user experience.
Let's now talk about what Lightning Experience is for getting a better understanding of Salesforce Lightning.
Lightning Experience
The term 'lightning' refers to real lightning (one that comes with storms) which indicates the power of this tool. Lightning Experience is used to create fast, beautiful, and unique user experience so that sales teams and sales reps can sell faster and be focused on what's more important.
Lightning Experience uses the open-source Aura framework. However, it has a completely re-designed framework that creates a modern user interface.
Let's see what's new with Salesforce Lightning Experience.
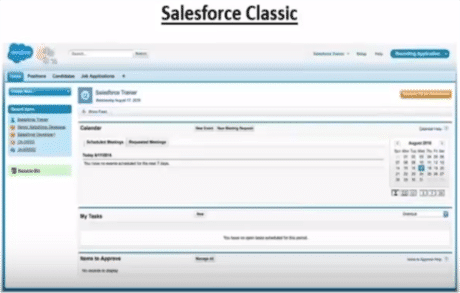
Look at the Salesforce Classic interface:
 Now, see the Salesforce Lightning Experience interface:
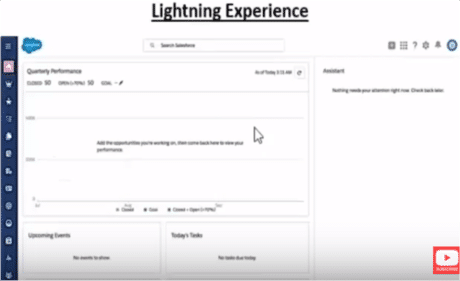
You can see how the whole interface has changed. Salesforce Lightning provides modern user experience across every device and also provides various tools that help build/update new applications with Lightning App Builder and Lightning Component.
Get certified from this Top Salesforce Course in Singapore today!
Get 50% Hike!
Master Most in Demand Skills Now !
Lightning Component
Lightning Component is a UI framework to develop dynamic web applications for mobiles and desktops. It uses JavaScript (at the client-side) and Apex (at the server-side) to create single-page web applications. This framework is a collection of codes where you can create applications without writing codes. Lightning Component consists of an event-driven architecture that has made it easy to build many applications.
Example:
Let's say you want to build or update a weather application with the Lightning framework.
<aura:application> <ns: myAwesomeMaplat="12.9049314.77.6460073.6z" lon="122.4167" /> <ns: weather lat="37.7833" lon ="12.904" /> </aura:application>
Important features of Lightning Component:
- As mentioned earlier, the Lightning Component framework can be used to create single-page applications. See the below picture:
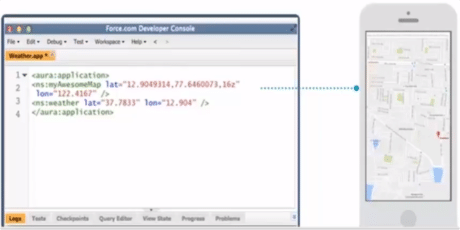
- Lightning Component is used by Salesforce to deal with the client side (for the server side, Salesforce relies on Apex).

- Lightning Event Handler: As discussed earlier, Lightning Component is built based on an event-driven architecture. User interface events are driven by a user interacting with the UI. It assists handlers (to write handler codes) to handle UI events.
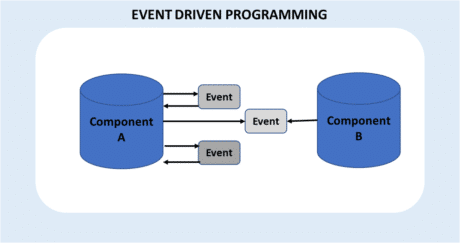
- Lightning Component contains a number of related resources that work together.
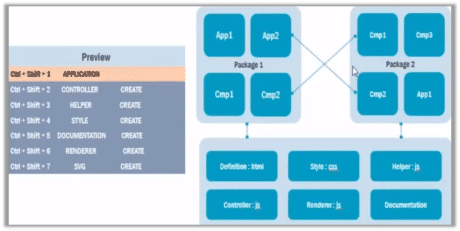
- You can build a personalized app with Lightning App Builder, i.e., you can develop apps in the way you want to increase sales.
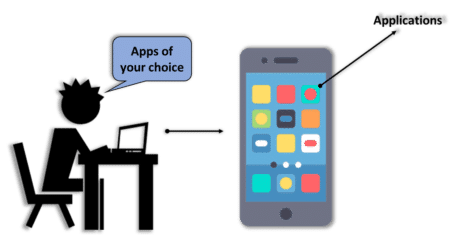
- You can use Lightning Component anywhere at any time, even when you are offline.
- Besides, you can customize Salesforce CRM to use it effectively and successfully.
- Lightning Component is built on the open-source Aura framework.
Why use the Lightning Component framework?
Why should you use Lightning Component? Here are the benefits of using the Lightning Component framework:
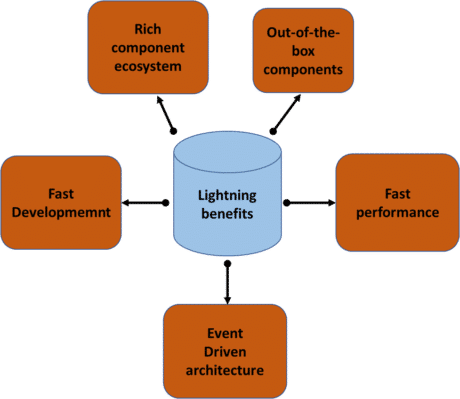
- Out-of-the-box components: The Lightning Component framework has more than 175 features that help in many ways, which Salesforce Classic lacks.
- Rich component ecosystem: You can use the already available components in Salesforce through Salesforce Lightning.
- Faster performance: Suppose, if you want some data, then it will send only the necessary data to you to increase efficiency.
- Event-driven architecture: It provides event handlers to handle events.
- Faster development
Learn everything about the Data Loader application in our blog on Salesforce Data Loader!
Open-source Aura Framework
With the open-source Aura framework, you can build apps regardless of what data you have—either structured or unstructured data—in Salesforce. In other words, you have everything to develop an app and build a UI without having to know technical coding.
You can get this framework from:
https://github.com/forcedotcom/aura
The Aura namespace contains components to simplify your app logic; the UI namespace contains components for the user interface, and the force namespace contains components for Salesforce. However, the Aura framework is not totally available in the Lightning Component framework.
Prepare yourself for the industry by going through these Top Salesforce Interview Questions and Answers!
Browser Support Considerations for Lightning Component
Different browsers support different versions of Salesforce Lightning. Here is the list of browsers with the versions of Salesforce that they support:
| Microsoft® Internet Explorer® | Google Chrome™ | Apple® Safari® | Microsoft® Edge | Mozilla® Firefox® | |
| Lightning Out | IE 11 (support for IE 9 and 10 ends on April 5, 2019) | Latest | 11.x+ | Latest | Latest |
| Lightning Experience | IE 11 (support for IE 9 and 10 ends on April 5, 2019)1 | Latest | 11.x+ | Latest | Latest |
| Outlook Integration (Web) | IE 11 (support for IE 9 and 10 ends on April 5, 2019) | Latest | 11.x+ | Latest | Latest |
| Outlook Integration (Client) | IE 11 (support for IE 9 and 10 ends on April 5, 2019) | Latest | N/A | Latest | Latest |
| Salesforce Console in Lightning Experience | N/A | Latest | 11.x+ | Latest | Latest |
| Standalone Lightning App (my.app) | IE 11 (support for IE 9 and 10 ends on April 5, 2019) | Latest | 11.x+ | Latest | Latest |
Using Developer Console
What you see below is called Developer Console. It provides tools and components to develop your apps.
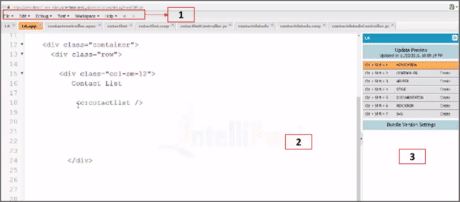 Features of Developer Console
- Box 1 represents the menu bar that is used to create or open the following Lightning resources:
- Tokens
- Interface
- Application
- Component
- Event
- Box 2 represents the workspace where you can work on your Lighting resources.
- Box 3 represents the sidebar that is used to create or relocate the client site resources:
- Design
- Helper
- Style
- Controller
- SVG
- Documentation
- Renderer

Creating a Component for Lightning Experience and Salesforce Mobile App
Now, as you have learned the basics of Salesforce Lightning, let's check out some examples to learn how to create a component for Lightning Experience and Salesforce Mobile App.
Here are the steps to load contacts:
This is a component in the Salesforce App. Two components, i.e., contactList and contacts iterate over and display contact components. Contacts are displayed in the contact list. You can also select different lead sources to view a subset of contacts.
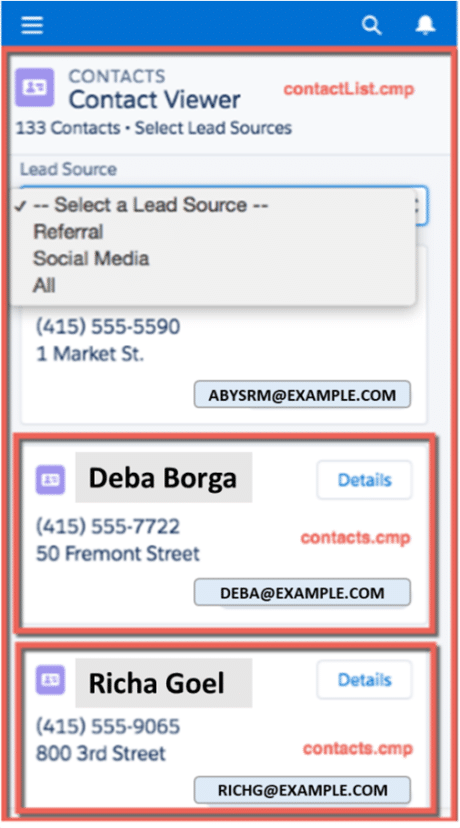
| Contacts Bundle | Description |
| contacts.cmp | Displays individual contacts |
| contactsController.js | Navigates to a contact record using force: NavigateToObject event |
| contactList Bundle | Description |
| contactList.cmp | Loads the list of contacts |
| contactListController.js | Loads the contact data and handles the lead source selection |
| contactListHelper.js | Displays a message on successful loading of contact data and displays and updates the total number of contacts |
| Apex Controller | Description |
| ContactController.apxc | Queries contact records and records them based on different lead sources. |
Let's now create the above resources:
You can load contacts on the Apex controller after its creation. Apex controller connects the components and data in Salesforce. Before starting this, you must have a basic understanding of HTML and CSS. If you know HTML and CSS, you can easily understand the below codes.
Assuming that an organization has contact records, follow the below steps:
- Go to File > New > Apex Class
Enter ContactController in New Class. A new Apex class ContactController.apxc is now created.
Code and Save:
public with sharing class ContactController{ @AuraEnabled public static List<Contact>getContacts(){ List<Contact> contacts =[SELECT Id, Name, MailingStreet, Phone, Email, LeadSource FROM Contact]; } } - Go to File > New > Lightning Component
Enter contacts for the Name field in the New Lightning Bundle window. Component contacts.cmp is created now.
Code and Save:
<aura:component> <aura:attribute name="contact" type="Contact" /> <lightning:card variant="Narrow" title="{!v.contact.Name}" iconName="standard:contact"> <aura:set attribute="actions"> <lightning:button name="details" label="Details" onclick="{!c.goToRecord}" /> </aura:set> <aura:set attribute="footer"> <lightning:badge label="{!v.contact.Email}"/> </aura:set> <p class="slds-p-horizontal_small"> {!v.contact.Phone} </p> <p class="slds-p-horizontal_small"> {!v.contact.MailingStreet} </p> </lightning:card> </aura:component> - Go to File > New > Lightning Component
Enter contactList for the Name field in the New Lightning Bundle window. Now, Component contactList.cmp is created. For the namespace, replace ContactController with myNamespace.ContactController and wire up the Apex controller to the component.
Syntax:
controller="ContactController"
Code and Save:
<aura:component implements="force:appHostable" controller="ContactController"> <aura:handler name="init" value="{!this}" action="{!c.doInit}"/> <aura:attribute name="contacts" type="Contact[]"/> <aura:attribute name="contactList" type="Contact[]"/> <aura:attribute name="totalContacts" type="Integer"/> <div class="slds-page-header slds-page-header_object-home"> <lightning:layout> <lightning:layoutItem> <lightning:iconiconName="standard:contact" /> </lightning:layoutItem> <lightning:layoutItem class="slds-m-left_small"> <p class="slds-text-title_capsslds-line-height_reset">Contacts</p> <h1 class="slds-page-header__titleslds-p-right_x-small">Contact Viewer</h1> </lightning:layoutItem> </lightning:layout> <lightning:layout> <lightning:layoutItem> <p class="slds-text-body_small">{!v.totalContacts} Contacts • View Contacts Based on Lead Sources</p> </lightning:layoutItem> </lightning:layout> </div> <lightning:layout> <lightning:layoutItem padding="horizontal-medium" > <lightning:selectaura:id="select" label="Lead Source" name="source" onchange="{!c.handleSelect}" class="slds-m-bottom_medium"> <option value="">-- Select a Lead Source --</option> <option value="Referral" text="Referral"/> <option value="Social Media" text="Social Media"/> <option value="All" text="All"/> </lightning:select> <aura:iteration var="contact" items="{!v.contacts <c:contacts contact="{!contact}"/> </aura:iteration> </lightning:layoutItem> </lightning:layout> </aura:component> 
- Click on CONTROLLER to create a resource, i.e., contactListController.js. Replace the placeholder code with the below code and save:
({ doInit : function(component, event, helper){ helper.loadContacts(component); } handleSelect : function(component, event, helper){ var contacts = component.get("v.contacts"); var contactList = component.get("v.contactList"); var selected = event.getSource().get("v.value"); var filter = []; var k = 0; for (var i=0; i<contactList.length; i++){ var c = contactList[i]; if (selected != "All"){ if(c.LeadSource == selected){ filter[k] = c;k++; } } else { filter = contactList; } } component.set("v.contacts", filter); helper.updateTotal(component);} }} - Click on HELPER to create a resource, i.e., contactListHelper.js. Replace the placeholder code with the below code and save:
({ loadContacts : function(cmp) { var action = cmp.get("c.getContacts"); action.setCallback(this, function(response){ var state = response.getState(); if (state === "SUCCESS"){ cmp.set("v.contacts", response.getReturnValue()); cmp.set("v.contactList", response.getReturnValue()); this.updateTotal(cmp); var toastEvent = $A.get("e.force:showToast"); if (state === 'SUCCESS'){ toastEvent.setParams({ "title": "Success!", "message": " Your contacts have been loaded successfully." }); } else{ toastEvent.setParams({ "title": "Error!", "message": " Something has gone wrong." }); } toastEvent.fire(); }); $A.enqueueAction(action); }) updateTotal: function(cmp){ var contacts = cmp.get("v.contacts"); cmp.set("v.totalContacts", contacts.length); } })
Firing Events
In the client-side or helper functions, you have to fire events. Lightning Experience handles force events. Let's test:
- Click on CONTROLLER to create a resource, i.e., contactsController.js. Replace the placeholder code with the below code and save:
({ goToRecord : function(component, event, helper){ var sObjectEvent = $A.get("e.force:navigateToSObject"); sObjectEvent.setParams({ "recordId": component.get("v.contact.Id") }) sObjectEvent.fire(); } }) <lightning:button name="details" label="Details" onclick="{!c.goToRecord}" /> This triggers goToRecord on the client side.
- Refresh the Custom tab and click on Details
The force:navigateToSObject is fired now that updates the view to display the contacts.
Have you got more queries? Come to our Salesforce Community and get them clarified today!
Conclusion
This brings you to the end of the Salesforce Lightning tutorial. In this tutorial, you learned in detail about the overview of Salesforce Lightning. You have also covered almost all the main topics of Salesforce Lightning such as why to use it, how to create components, etc.
Join Intellipaat's Salesforce Lightning Training Course and Salesforce Certification today and let you and your organization be the best in sales!
How To Create A Lightning App In Salesforce
Source: https://intellipaat.com/blog/tutorial/salesforce-tutorial/salesforce-lightning-tutorial/
Posted by: leetabefore.blogspot.com

0 Response to "How To Create A Lightning App In Salesforce"
Post a Comment