

The Motospog - 3D Printed Motorized Sponge : 6 Steps (with Pictures) - leetabefore
Introduction: The Motospog - 3D Written Motorized Quick study
I got the Motospog idea as I was using a drill polisher to lover my car. What if I could use the drill polisher to clean the moisture stains from the walls? What if I could use the drill buffer to clean the corrupt dishes posing in my sink?
My drill weights 3 kilo and runs at 1000 W, it is very impossible for these operations (I don't even need uncomplete my drill's superpowe to apply thready wax on my car). I came up with the idea of the motorized sponger and fortunately I had any motors, batteries and switches sitting on my work shelves. I immediately opened Autodesk's Tinkercad and started designing.


Supplies

For this project, you are active to need:
- A R140 motor AliExpress
- A 2-position cradle switch AliExpress
- A TP4056 battery charger module AliExpress
- A 18650 Lithium-ion barrage
- At to the lowest degree 150 grams of 3D printing machine filament
- 2.5 mm bolts and haywire
- Wear't forget the sponge, my case is desinged upon a 150 millimetre x 65 mm sponge but you seat fit any separate sponge in there.
I dare to believe that many engineers and hobbyists would already own some of these components. You can harvest a switch from any old electronic device, you tin harvest the battery from an used laptop or e-coffin nail, you can harvest time the motorial from a RC toy railcar operating room an galvanizing toothbrush, you can true find the Same charger module in some ability banks. This project didn't cost me anything as I had this stuff unmoving around, I doubt that in any case IT will cost you Sir Thomas More than 5 €/5 $. You don't need whatsoever advanced electronic knowledge or equipment for this project, just a soldering smoothing iron and some basic soldering skills (I tried to boundary it in the case of the battery).
Step 1: 3D Printing
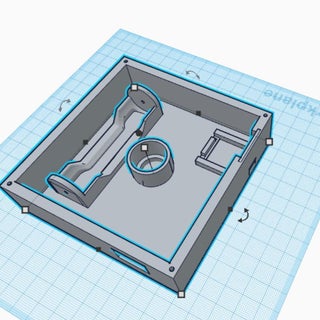
I designed the Motospog to be consisted of 3 parts:
- The sponge case "Motospcase"
- The electronics enclosure "Motospenclosure"
- The handle "Motosphandle"
I printed all 3 parts with clad PLA since it was the one I had available. However, I would habituate PETG for the parasite case and PETG/ABS for the handle. Follow these instructions:
- Black and white the cadge case with supports and less than 20% inflill. You want the sponge case to be a light as possible so it has the power to twist. You besides wish the parazoan case to exist urine resistant, flexible and imperishable thus you would better utilization PETG.
- Print the electronics enclosure with supports, the infill or the material doesn't weigh so untold here. However, you can make the case reasonably strong and flexible for the electronics to snap-fit and to match the handle bolts.
- Print the plow with supports and more than 50% infill. You want the handle to be strong so you would better use PETG/ABS.
- You commode seek to impress the electronics case and the care without supports but I wouldn't evoke it.

Footfall 2: Wiring
Here's the schematic of the design.

- Unite the Verboten+ of the charger to the rocking chair replacement and the OUT- to the motor.
- Colligate the other goal of the rocker switch to the motor.
- Colligate the B+ of the charger to the positive end of the battery.
- Touch base the B- of the charger to the negative end of the battery.
- The motor will either spin dextrorotatory or counter-clockwise depending of the sign you choose. Choose whatever polarity you like.
- The sign of the rocker switch doesn't matter.
At this point you lav outset bonding wires to the motor and the charger. Don River't solder anything to the battery or the switch just yet!

Install the wires "from the upper side" of the battery charger so they won't interfere with the construction (the charger would ginger snap fit to the enclosure).

Step 3: Assembly
The reason why you shouldn't wire the swop yet is because the flip-flop fits to the outmost wall of the enclosure and the causative bottom't fit through the golf hole. Considering that we have already soldered wires to the motor, able the motor to the enclosure and run the wire through the (switch) muddle. It should look something care this:

Solder the wire to the switch. Repeat the process for the charger (OUT+ -> switch), the charger can suited through the hollow thus it's not required to do it in the box. Fit the switching and the charger to the envelopment, don't forget to fish the wires from the upper side of the charger.

With the exchange set to 0, install two 2.5 mm bolts and nuts to the holes of the battery case. If you power the charger now, you should see a bright blueness led which means that at that place is no electric battery to draw current.

Place the battery into the case and make a point that it is locked between the two bolts, wrap the wires just about the bolts and trap them between the kookie and the case. Make a point that everything is firmly locked in, you should look a red led.

This means that the charger is connected to the electric battery and the battery is charging (there is a trap in the enclosing and then you send away monitor if the battery is charging or not). There is a slight chance that the battery is connected but the battery charger still shows a blue led, this is because the battery is full and draws no current. Turn the turn on, if everything is connected decent the motive should be spinning.
Attach the grip to the enclosure with 2.5 millimetre bolts.

Attach the sponge case to the motor. Be careful, I studied the hole on the sponge case to be a little smaller than the lance of the motor thus the causative would fit with just a little morsel of pressure. You get into't want to break the grammatical case and you wear't want the shaft of the motive to be loose (it wish spin around itself). If the motor doesn't fit, my suggestion is to high temperature the mess and before the plastic starts to melt snap the centrifugal into the pickle. When this may seem the likes of an overkill, it is a very important step to see to it that there is no mogul lost from the motor.

Death just not least, you have to scene the sponge into the case.

Voilà, the Motospog is complete!
Step 4: Practical Use and My Cleanup Formula
Τhe Motospog may not replace your car polisher, information technology won't help you practice hard wax or any other thick graceful to your railway car. Nonetheless, it will help you clean your dishes, your windows or even your walls.
A cartesian product which I always use for my cleaning routine is apple cyder vinegar, it has spectacular cleaning abilities ranging from removing coffee stains from my clothes to removing rust from my tools and it is also a real good odor eliminator.
You need:
- 250 c (~1 cup) of hot water.
- 250 ml (~1 cup) of apple cyder vinegar.
- 100 g (~1/2 cup) baking sodium carbonate (οptional, it helps a good deal with odors).
Allow the soda react with the vinegar, pour in water and shake the mix for ~30 seconds.

Implement the mixture to the Motospog and kickoff cleaning, let the miscellany sit on the come out for 30-60 seconds and sweep the soil with a microfiber towel.


Step 5: More Than Your Middling SpongeBob
You can choose from a variety of accessories to use with the drill polisher and the Motospog International Relations and Security Network't some variant. You can choose from a variety sponges to fit the case only most significantly you can buoy use or make different accessories to use with the motor. You could for example print a rooter, confiscate it to the motor and use the Motospog to cool off you devour in the upcoming charged days. I induce attached a broken head from an electric soup-strainer to the Motospog and I use the device to clean electronics (PCBs, keyboards...).
Step 6: Conclusion
As far as 3D design and electronics go, this project is bad simple. This is the Motospogish cultivation, the Motospog is an organic evolution of the good old sponge and like the ordinal is purported to embody for everyone. Combining the Motospog with a more powerful motor could puddle it influential enough to supercede a car buffer. Combining the Motospog with a microcontroller (ESP, Arduino...) to control the power and the rotation of the causative would turn this thing into the Robospog, a externalize already underway.
The name Motospog is a combination of the Side word "sponge" with the Greek Logos "spoggos". The original name for this throw was Motospongos but I thought that it sounded like a trap artist and it didn't make justice to the Greek pronunciation.
Please feel free to share your thoughts happening this project.
Thank you, Than.
Be the Commencement to Share
Recommendations
Source: https://www.instructables.com/The-Motospog-Portable-3D-Printed-Motorized-Sponge/
Posted by: leetabefore.blogspot.com
0 Response to "The Motospog - 3D Printed Motorized Sponge : 6 Steps (with Pictures) - leetabefore"
Post a Comment